Molding and Casting is a very old way of fabricating and for sure quite easier to understand for me. I was personally excited to take this class since I find that I might use it in many applications in my life. I’ve done molds before in an analogue way, with ceramics and plaster but molding with digital fabrication is a whole other level. From directly 3D printing the desired mold to milling the mold on wax with the small Ronald milling machine or even milling big molds with the CNC. With the CNC we can mill bigger molds but the resolution should be lower so the casting is gonna have some texture. While with the wax milling we can achieve very high-resolution molds.
In any case, what it is important to have clear is the material that your desired piece is going to be made of. If the output is a soft material like silicone, your mold should be done on hard material. Do not forget to check the datasheet of the casting materials as well as apply the release agent suitable for the material you are going to cast.
There are different types of molds, 1 side mold, 2 sides molds or more complex molds with up to 6 sides, as well as the technique of rotocasting. In the case of 2 sides molds or more its important to create aligment holes in rounded shapes and leave a hole to pour the material.
Weekly task
Make a mold (can be 1 or two sides) HARD-SOFT-HARD . 3DPRINT- CAST SILICONE- CAST SOMETHING INSIDE
You can use biomaterials to substitute the silicone or the final cast. Experiment!
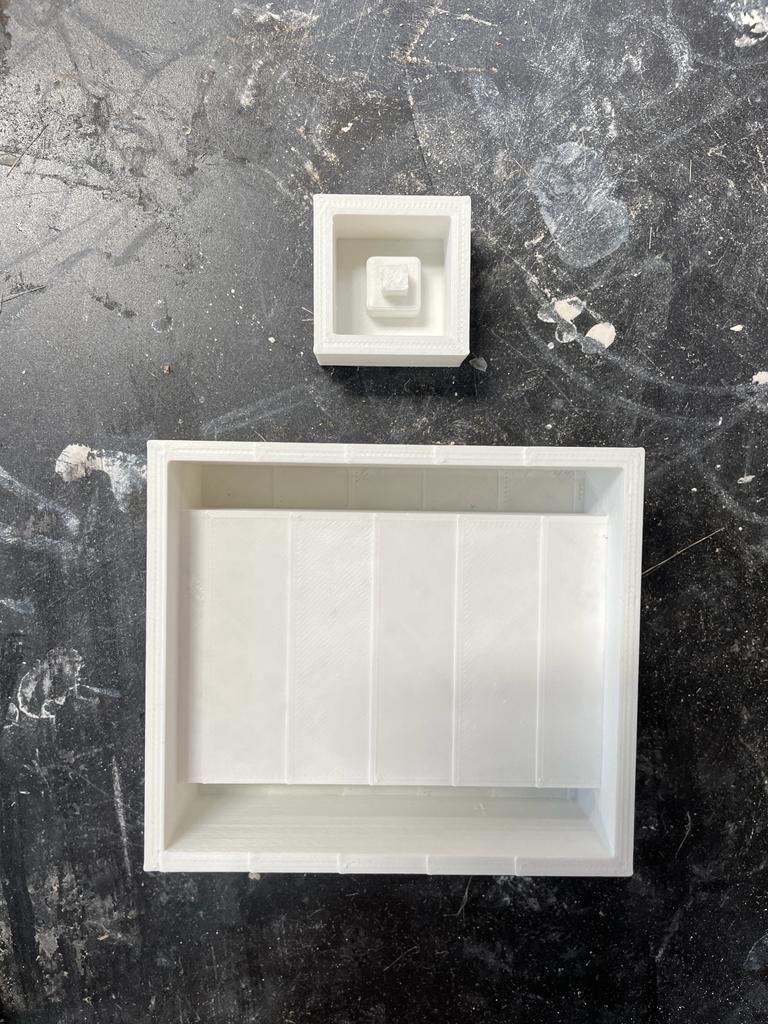
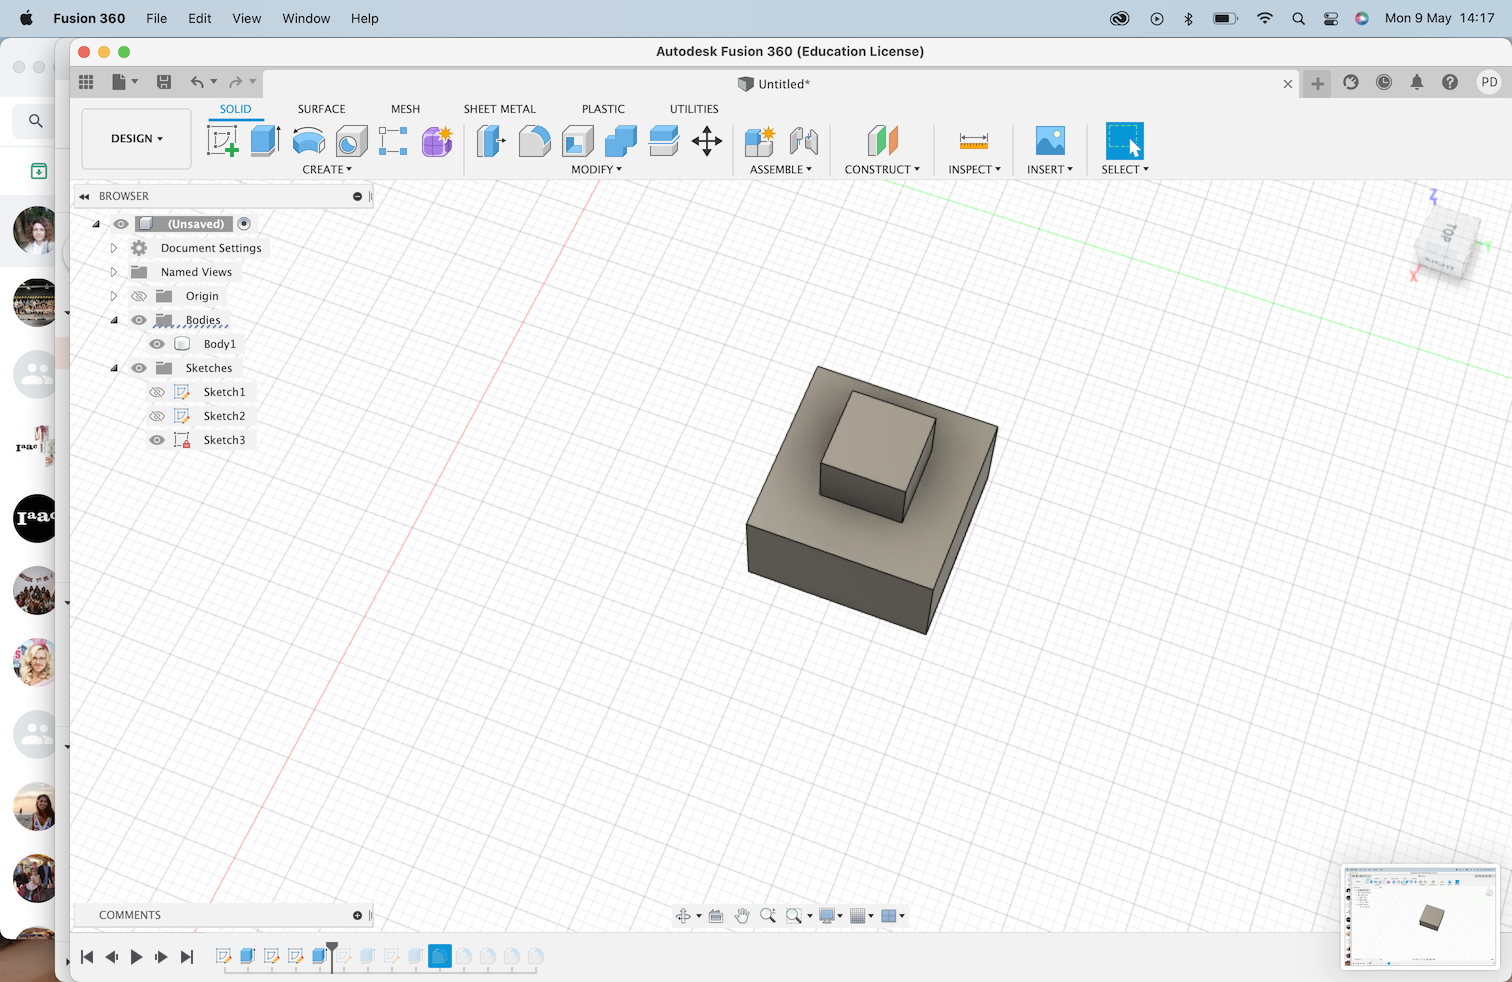
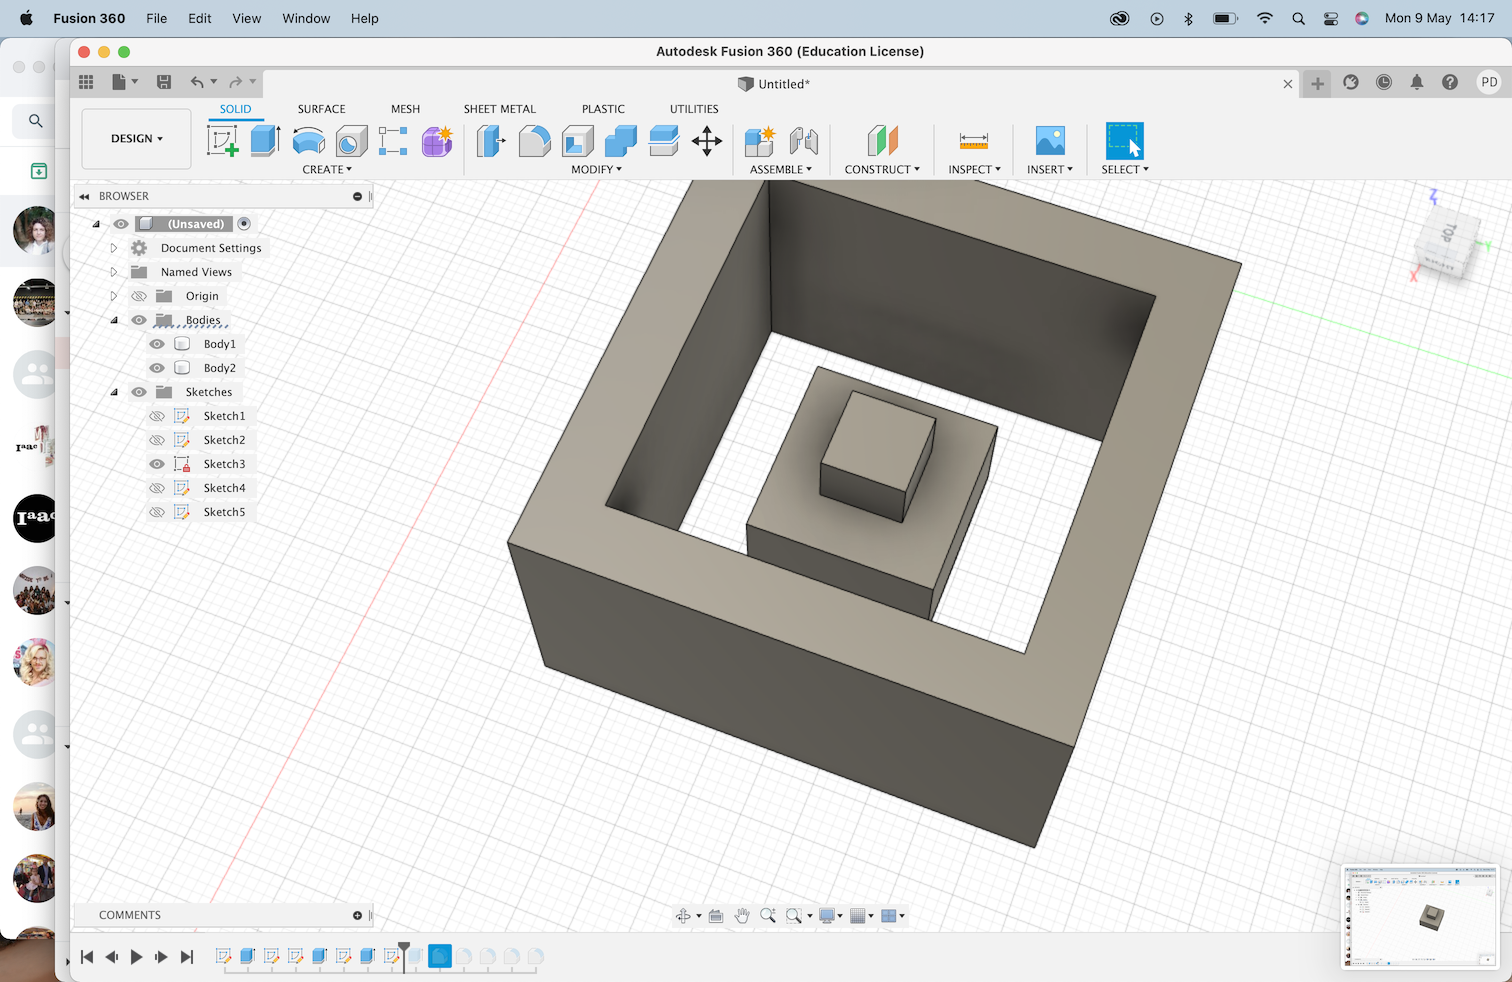
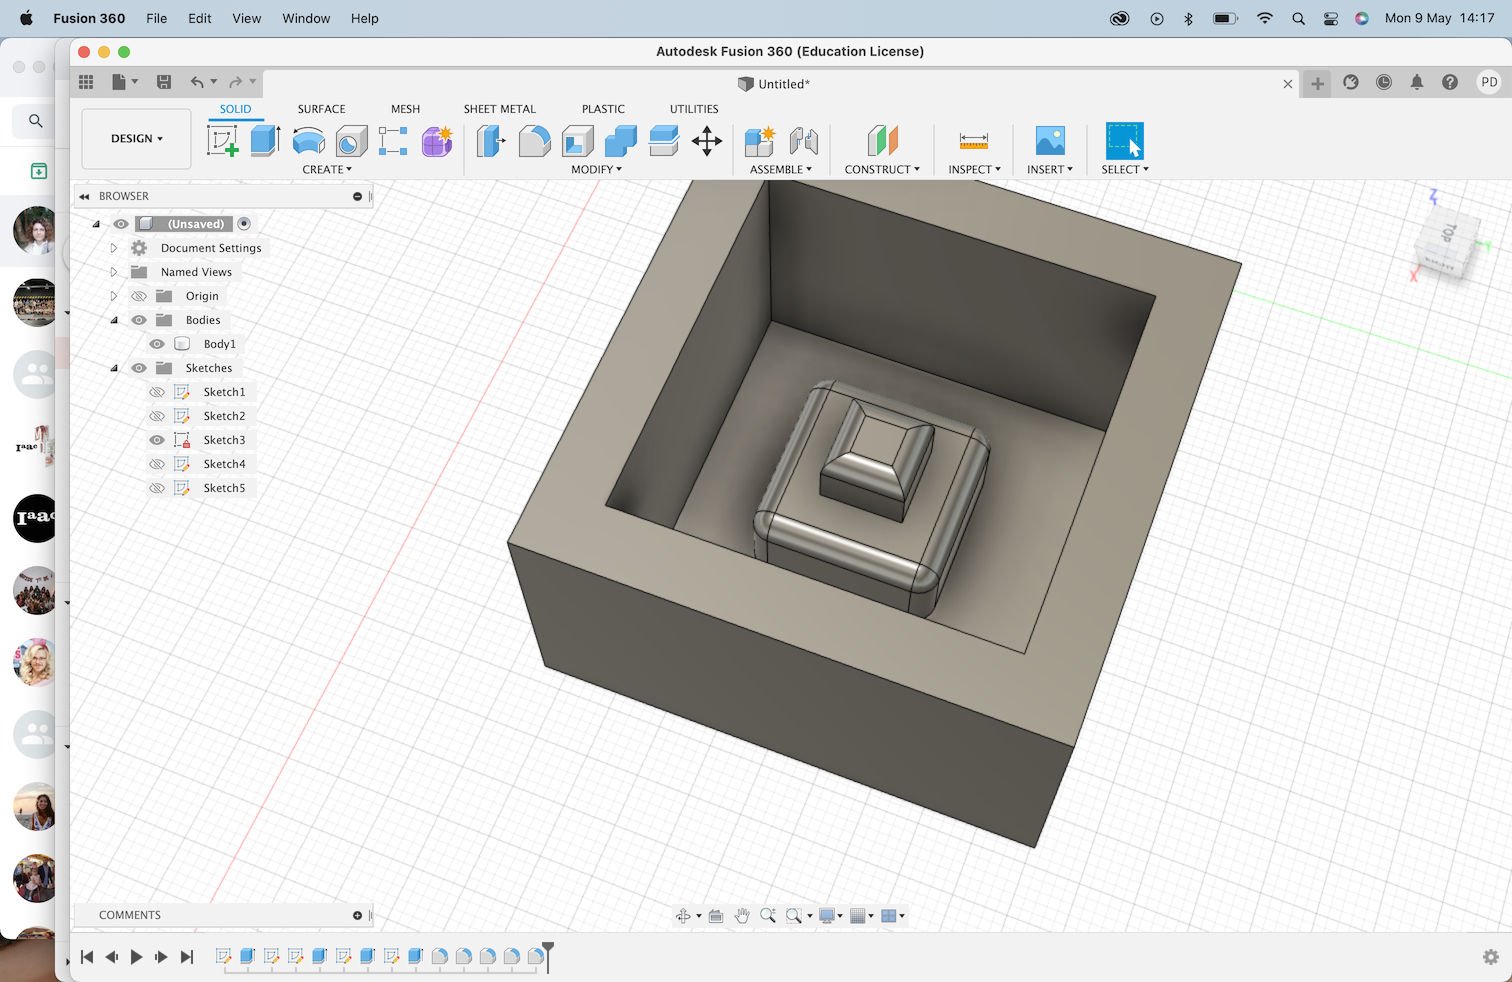
In this case the desired outcome is going to be a hard epoxy transparent resin with the LDR sensor inside. I have designed a mold in 3D to be printed in the 3D printer with the positive shape to after cast the silicone mold that will cast the final piece with the sensor inside.
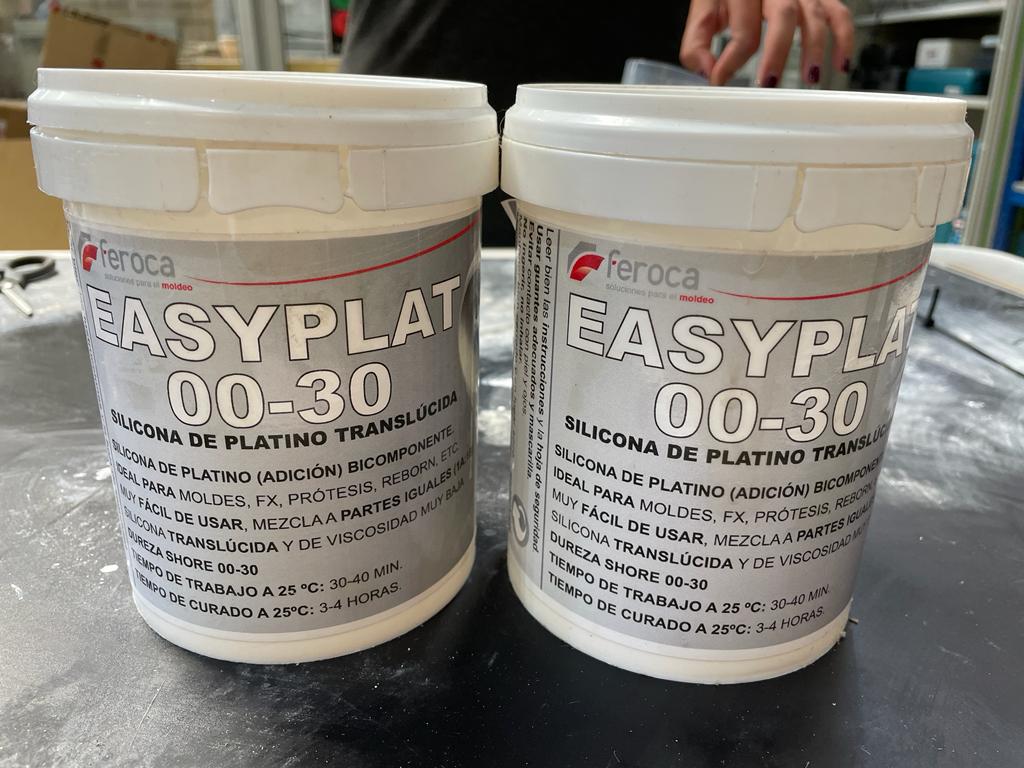
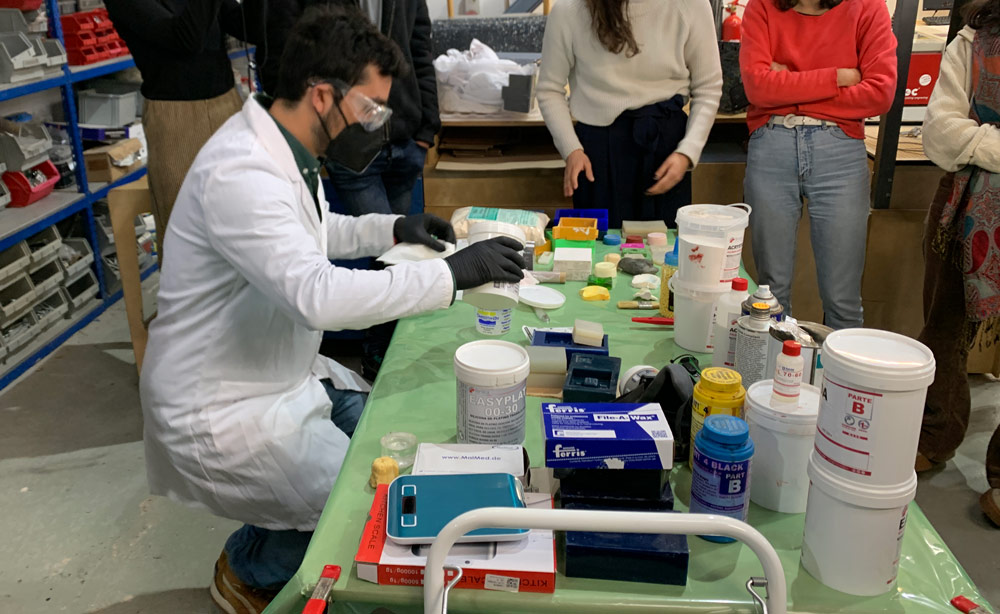
The silicone that we used Easyplat 00-30 translucid silicone that works at a 1:1 parts of the base and the binder mixture. It is very important to have all the tools and molds ready before mixing the 2 parts since some of the silicones have a very short set time. Plus adding the release agent to the mold.
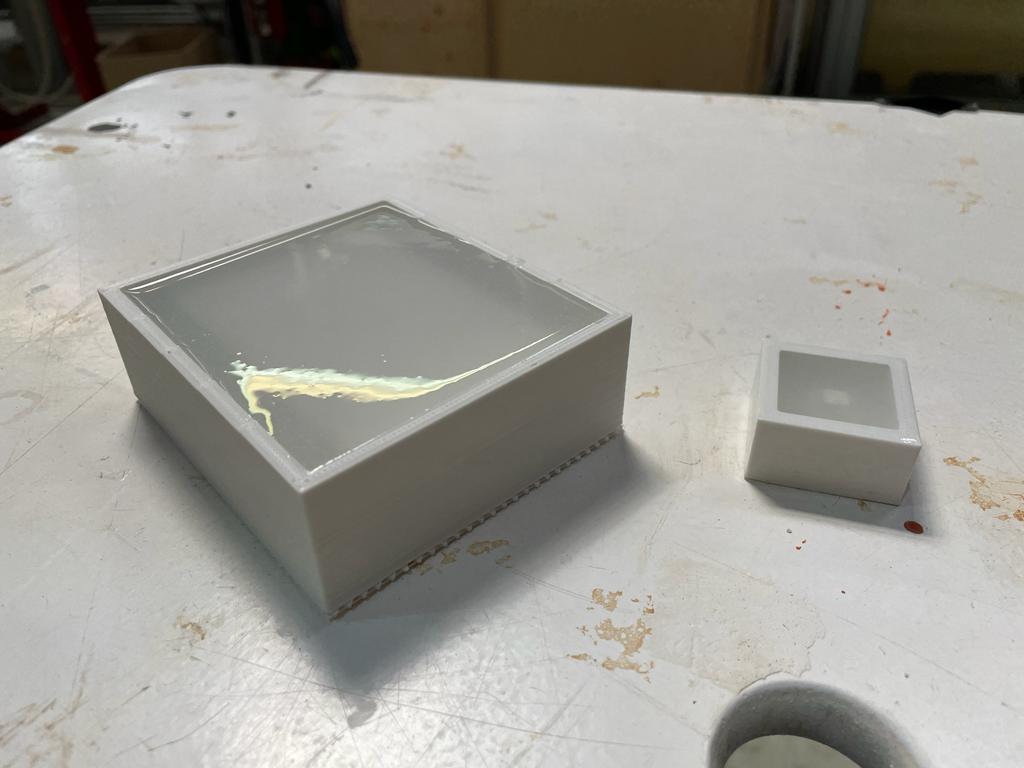
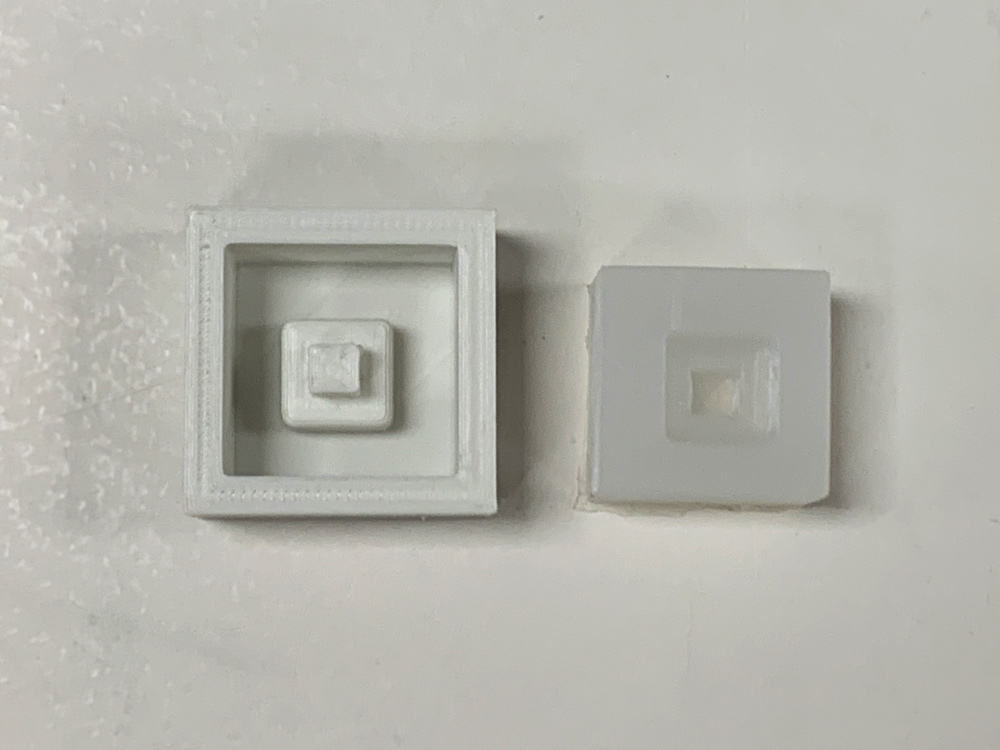
After letting the molds dry and curate we pressed in the mold the sensor to make sure it will stay still. In order to better encapsulate the sensor we first solder it to the cable and stick it in the mold. Pouring the epoxy resing and letting it dry and curate again according to the time specified on the datasheet.
The silicone that we used Easyplat 00-30 translucid silicone that works at a 1:1 parts of the base and the binder mixture. It is very important to have all the tools and molds ready before mixing the 2 parts since some of the silicones have a very short set time. Plus adding the release agent to the mold.
After letting the molds dry and curate we pressed in the mold the sensor to make sure it will stay still. In order to better encapsulate the sensor we first solder it to the cable and stick it in the mold. Pouring the epoxy resing and letting it dry and curate again according to the time specified on the datasheet.